
Introduction: Why a Precise Process Matters in Tampa
Carpet care is not just about removing visible spots; it is a sequence of interdependent steps that protect fibers, backing, and indoor air quality. In Tampa, Florida, the process matters even more due to coastal humidity, fine sand, and year-round allergens that can settle deep in carpet. This guide breaks down each step from preparation to final grooming so you can replicate professional-grade results at home. And if you choose to bring in a service occasionally, you will better understand the method behind quality carpet cleaning.
Each phase builds upon the previous one. Skipping a step can cause rapid re-soiling, persistent odors, or recurring stains. Follow the sequence carefully, and adapt the dwell times, chemistry, and drying strategy to Tampa’s climate.
Step 1: Pre-Inspection and Testing
Identify fiber type, construction, and areas of concern. Look for delamination risks, loose seams, and frayed edges. Perform a colorfastness test with your chosen spotters and pre-spray in a hidden area. Note traffic lanes, pet zones, filtration lines along baseboards, and any previous water damage. This baseline guides your chemistry choices and agitation methods.
Step 2: Dry Soil Removal
Thorough vacuuming removes the majority of dry soils. Work slowly with overlapping passes in different directions to lift pile and extract grit. Pay special attention to entries, hallways, and areas near open windows where Tampa air can bring in salt and pollen. Use tools for edges, stairs, and under furniture lips.
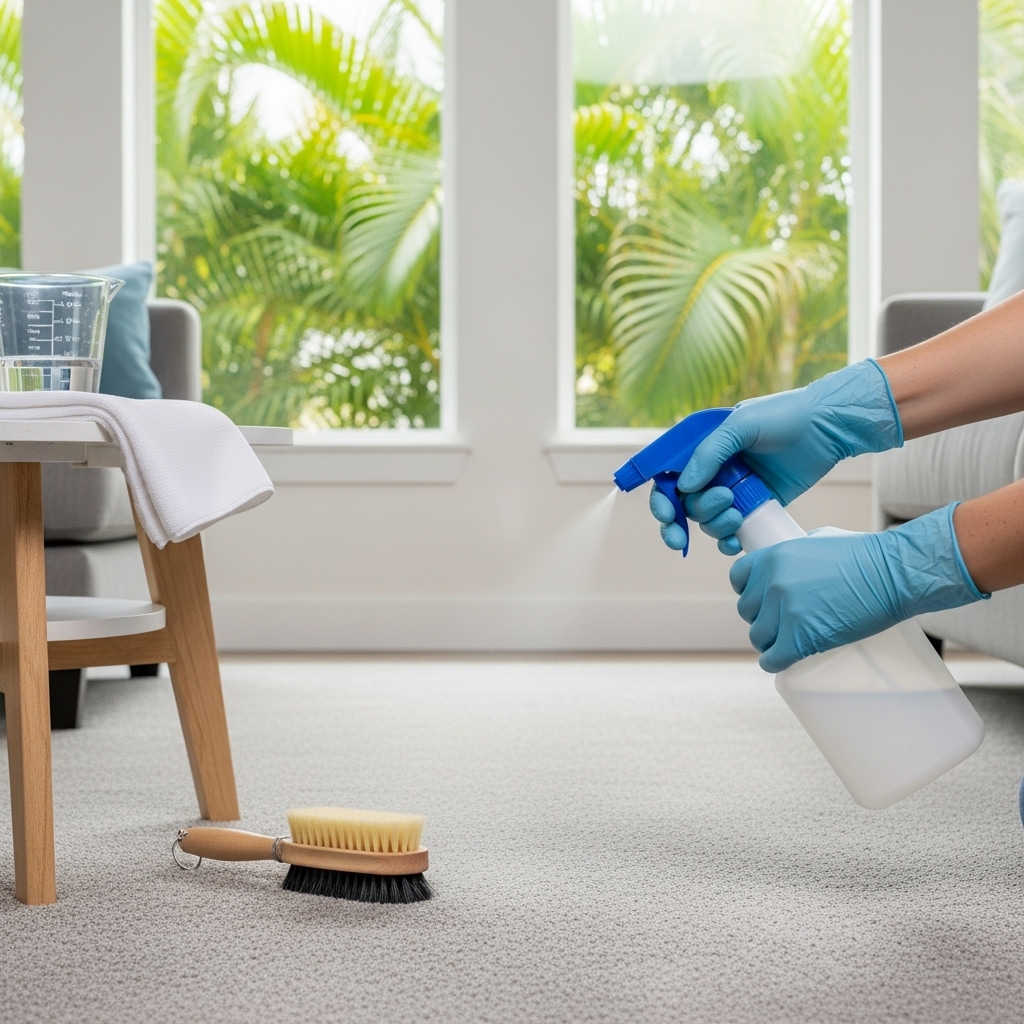
Step 3: Spot and Stain Pre-Treatment
Apply appropriate spotters based on soil type: enzymatic for food and pet accidents, solvent for oils and adhesive residues, and color-safe oxidizer for organic discolorations. Blot from the outside inward to prevent spreading. Allow dwell time as indicated on the product label. Rinse or towel out residues to avoid attracting new soil later.
Step 4: Pre-Conditioning the Carpet
Mix your pre-spray according to fiber type and soil load. Lightly apply to traffic lanes and progressively soiled areas. Avoid saturation. Agitate with a brush or carpet rake to distribute chemistry and lift crushed pile. Dwell time of 5–10 minutes is typical; monitor the surface to ensure it does not dry out before extraction.
Step 5: Agitation for Soil Suspension
Gentle mechanical agitation accelerates soil suspension. For synthetics, a soft-bristle brush is usually safe. For delicate fibers like wool, use minimal agitation and compatible pH. The goal is to loosen bonded soils so rinse water can carry them away, minimizing the need for harsh detergents.
Step 6: Rinse Extraction
Use hot water extraction with a neutralizing rinse for most synthetic carpets. Work methodically, overlapping strokes, and follow each wet pass with multiple dry strokes to remove as much moisture as possible. Keep hoses and tools clean to avoid streaks. In Tampa, where humidity slows evaporation, prioritize low-moisture techniques on cooler, damp days and reserve deep wet cleaning for times when you can run AC and fans aggressively.
Step 7: Secondary Treatment of Stubborn Spots
After the first rinse, re-check stains. Some may require a targeted second treatment. Apply a small amount of the appropriate spotter, dwell briefly, and rinse again. Avoid overworking spots that may be permanent dye damage or fiber distortion; recognize the difference between removable soil and altered fiber.
Step 8: Neutralization and Softness
Even if your rinse is neutral, check the feel of the carpet after extraction. If it feels slightly sticky or stiff, mix a mild acid rinse and make a light pass to bring pH closer to neutral. This step improves hand feel and reduces rapid re-soiling.
Step 9: Grooming and Texture Restoration
Groom the carpet with a rake to align fibers, blend wand marks, and distribute residual moisture evenly. Grooming also opens the pile to airflow, promoting quicker drying, which is crucial in humid conditions.
Step 10: Drying Strategy for Tampa Humidity
Turn on the air conditioner to lower indoor humidity and run fans to move air across the surface. If available, add a dehumidifier. Keep windows closed while the AC is running to maintain a controlled environment; open them briefly only if outdoor humidity is lower. Avoid heavy foot traffic until the carpet is dry from tip to backing.
Step 11: Post-Clean Inspection
Inspect the carpet in both natural and artificial light. Look at edges and transition strips for wicking or filtration lines. If you spot uneven areas, lightly groom again. Check that furniture tabs are in place under legs that contact damp carpet. Verify that no areas feel overly wet and adjust fans if needed.
Optional Path: Low-Moisture Encapsulation
When rapid turnarounds are important or humidity is high, encapsulation cleaning can be used as an interim method. Apply the encap product, agitate lightly, let it dry, and vacuum to remove crystallized residues. This approach keeps carpets looking cleaner between periodic extractions but does not replace deep rinsing entirely.
Addressing Tampa-Specific Soils
Sand and fine grit: These are abrasive and contribute to dull traffic lanes. Increase vacuuming frequency near entrances and sliders. Use walk-off mats and consider seasonal deep cleaning when beach visits are frequent.
Allergens and pollen: During peak pollen periods, vacuum more often with a HEPA-equipped machine and change HVAC filters to reduce redeposition onto carpet.
Moisture from storms: If water intrusion occurs, blot and extract promptly. Promote airflow, and consider a dehumidifier to prevent odors and microbial growth.
Equipment Care and Setup
Use clean, well-maintained tools to avoid streaks and residues. Rinse tanks before adding fresh solution. Periodically flush hoses, and check filters on your extractor. Keep extra white towels on hand to test cleanliness during the process; a towel that picks up soil indicates that you may need additional passes in that area.
Safety and Product Handling
Read labels carefully and store chemicals out of reach of children and pets. Wear gloves and eye protection. Never mix products unless the manufacturer specifies that it is safe. Spot test every chemical in a hidden area on each carpet, especially if you are not certain of the fiber type.
Quality Standards to Aim For
- Even appearance without streaks or zebra striping
- No sticky residue when the carpet dries
- Neutral or pleasant odor with no musty notes
- Dry times within 6–12 hours under AC and fans
- Traffic lanes that look blended and refreshed
When to Involve a Pro
Some challenges go beyond DIY: pet urine that has penetrated the pad, recurring browning, filtration lines, dye transfer, and post-flood odor issues. Professionals can deploy sub-surface extraction, advanced odor control, and fiber-specific chemistry that consumer machines cannot match. Periodically scheduling professional carpet cleaning alongside your routine helps maintain warranty standards and peak appearance.
Frequently Asked Questions
Q: How hot should rinse water be? A: Warm to hot water improves soil suspension on most synthetics, but do not exceed the temperature recommended for wool or specialty fibers.
Q: Why does a stain come back after drying? A: Wicking can pull residues from the backing. Re-treat lightly, rinse, and dry more aggressively with airflow focused over the area.
Q: Can I clean during Tampa’s most humid days? A: You can, but increase drying measures: lower AC temperature slightly, use more fans, and add a dehumidifier.
Q: Do I need to neutralize if I used a neutral pre-spray? A: If the carpet feels slightly stiff or sticky, a light acid rinse can still help. Your touch and appearance test are the final judge.
Q: How often should I perform each step? A: Vacuum several times per week, spot treat as needed, perform low-moisture maintenance monthly, and deep extract every 6–12 months.
Q: Is encapsulation safe for all carpets? A: It is widely compatible, but always test and follow label directions, especially on wool.
Bring Your Carpets Back to Life
By following this step-by-step sequence, you can clean more thoroughly, dry faster, and maintain a healthier home in Tampa. For periodic deep resets or stubborn issues, coordinate your routine with expert carpet cleaning to keep carpets looking their best season after season.