
A methodical inspection is the smartest way to keep your dryer vent safe and efficient. For Naperville, Florida homeowners, shifting seasons, tree cover, and varied home designs mean vents can clog in surprising ways—especially when the route includes long interior sections or roof exits. This comprehensive checklist will help you evaluate your system like a pro, prioritize maintenance, and know when to bring in a technician for deeper service. Use it before and after professional visits, during seasonal home checkups, or anytime you notice longer dry times.
Even if you are diligent about the lint screen, periodic professional dryer vent cleaning ensures the entire run—from the dryer connection to the exterior cap—remains clear. The steps below focus on safety, airflow, and durability so your dryer performs reliably throughout Naperville’s winters, springs, summers, and falls.
Pre-inspection safety
- Turn the dryer off and let it cool before touching connectors or the termination.
- Clear the laundry area of stored items to create workspace.
- Ensure good lighting and place a small mat for tools if needed.
Starting with a safe, organized space helps you work methodically and prevents accidental damage.
Step 1: Lint screen and appliance checks
- Remove and clean the lint screen. Look for tears, warping, or residue that reduces airflow.
- Wash the screen monthly with mild soap if you use fabric softeners or dryer sheets.
- Wipe the moisture sensor bars to support accurate cycle shutoff.
- Listen during operation for unusual noises that may hint at airflow issues.
The lint screen is your first line of defense. A compromised screen allows more fibers into the vent, accelerating buildup.
Step 2: Transition connector inspection
- Gently pull the dryer forward and examine the short connector from the dryer to the wall or floor duct.
- Replace crushed, kinked, or heat-damaged connectors with semi-rigid or smooth-wall metal transitions.
- Keep the connector as short and straight as possible; avoid excessive loops.
- Verify clamps are snug and joints are sealed with foil tape rather than screws.
This segment is frequently damaged when the dryer is pushed back after cleaning or moving. A crushed connector alone can cause long dry times.
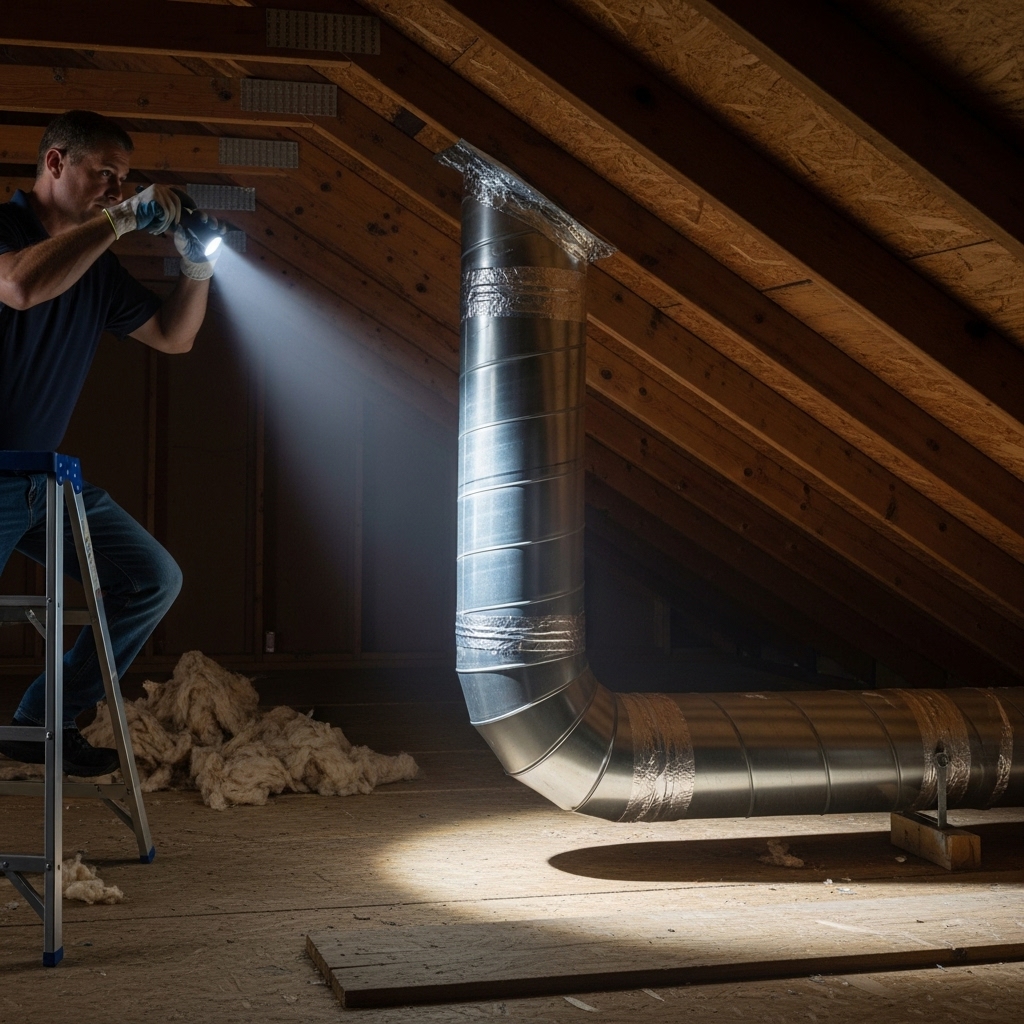
Step 3: Route mapping
- Determine where the duct travels—up an interior wall, across a basement ceiling, or through an attic to a roof cap.
- Note the number of elbows and approximate length; more bends usually mean higher restriction.
- Look for potential low spots in horizontal runs where lint and moisture can settle.
Route knowledge helps you anticipate trouble spots and decide if a professional should tackle the cleaning.
Step 4: Exterior termination review
- Locate the wall hood or roof cap. Confirm it is designed for dryers and opens freely under airflow.
- Check for lint accumulation, nesting materials, leaves, or snow blockage.
- Ensure the cap is sealed to the siding or roof to prevent leaks and drafts.
- Avoid mesh screens that trap lint; use a dryer-rated termination with a free-moving damper.
Naperville’s spring nesting season and winter freezes make this step crucial. A stuck damper can mimic deeper vent problems.
Step 5: Airflow and damper test
- Run the dryer on air-only or timed dry and go outside.
- Feel for strong, steady exhaust and watch for a fully opening damper.
- Weak airflow or chattering movement suggests restriction inside the duct or at the connector.
If the damper barely lifts, plan for a deeper cleaning and inspection of elbows and long runs.
Step 6: Interior duct condition (where visible)
- In basements or utility spaces with exposed duct, inspect for dents, crushed sections, or gaps.
- Check for proper support—long spans should not sag.
- Look for foil tape at joints rather than screws protruding into the air stream.
Visible sections offer valuable clues about the hidden parts behind walls and ceilings.
Step 7: Moisture and condensation checks
- Look for water stains on ceilings or walls along the vent path, especially after cold snaps.
- Confirm long horizontal runs are pitched slightly toward the exterior to prevent pooling.
- Monitor the laundry area for musty odors—often a sign of poor exhaust.
Condensation can create sticky residue that traps lint, compounding airflow issues over time.
Step 8: Post-cleaning verification
- After professional service, confirm stronger airflow and smoother damper movement.
- Ask for before-and-after airflow readings if available.
- Review recommendations for upgrades or repairs and schedule them promptly.
Verification ensures that the cleaning addressed the full route and that remaining issues are prioritized.
Seasonal checklist for Tampa homes
- Winter: Check for ice or snow at the exterior cap and ensure the flap moves freely.
- Spring: Inspect for nesting materials and trim landscaping near wall hoods.
- Summer: Re-verify the transition connector is not crushed after any appliance moves.
- Fall: Clear leaves from around the termination and plan your annual professional cleaning.
Aligning your checklist with the seasons helps you stay ahead of Naperville’s climate-related challenges.
Common issues and quick fixes
- Long dry times: Inspect the transition connector and termination first; schedule a full cleaning if airflow is weak.
- Burnt-lint odor: Stop the dryer and check for blockages or compacted lint near the heater housing.
- Damper chatter: Indicates marginal airflow; address restrictions and verify the cap design.
- Lint on siding: Damper not sealing or turbulent exhaust; consider a termination upgrade.
Persistent symptoms after quick fixes usually mean deeper restrictions inside elbows or long runs. That is when specialized cleaning tools are needed.
Upgrade recommendations
- Use rigid or semi-rigid metal ducting for the main run and a short, safe transition connector.
- Minimize elbows and eliminate unnecessary bends.
- Support ducts to prevent sagging and low spots.
- Seal joints with foil tape and avoid screws that penetrate the air path.
- Install a dryer-rated termination with a free-moving damper; avoid screens.
These changes reduce static pressure, improve reliability, and decrease maintenance frequency.
When to call a professional
- Roof terminations or multi-story routes that include several elbows.
- Evidence of nesting, stuck dampers, or damaged caps.
- Repeatedly crushed connectors behind stackable or tight-install dryers.
- Weak airflow persists after basic checks and exterior cleaning.
Professionals can navigate long routes, access roof caps safely, and provide airflow measurements that confirm results.
Frequently Asked Questions
Q: How often should I perform this checklist? A: Review quarterly and after any laundry room changes. Plan a professional inspection annually or sooner if symptoms appear.
Q: Can I place a screen over the hood to stop birds? A: Avoid mesh screens. Use a termination designed for dryers that prevents nesting while maintaining airflow.
Q: What if my vent is very long? A: Long runs demand careful routing and regular cleaning. A professional can assess whether design changes would help.
Q: Will cleaning speed up drying? A: Yes. Improved exhaust shortens cycles, reduces heat stress, and keeps fabrics in better condition.
Q: Is semi-rigid duct good enough? A: Semi-rigid is a safe, practical choice for transitions. For long runs, rigid metal is preferred.
Q: Why does my laundry room smell musty? A: Moist exhaust trapped by a restriction can cause lingering odors. Clearing the vent and verifying damper movement usually resolves it.
Ready to protect your Tampa home?
Use this checklist as part of your regular home maintenance routine, and do not ignore early warning signs like weak airflow or long dry times. When deeper service is needed, schedule professional dryer vent cleaning to restore safe, efficient performance and keep your laundry days running smoothly year-round.